![]()
JSyntax Reviews
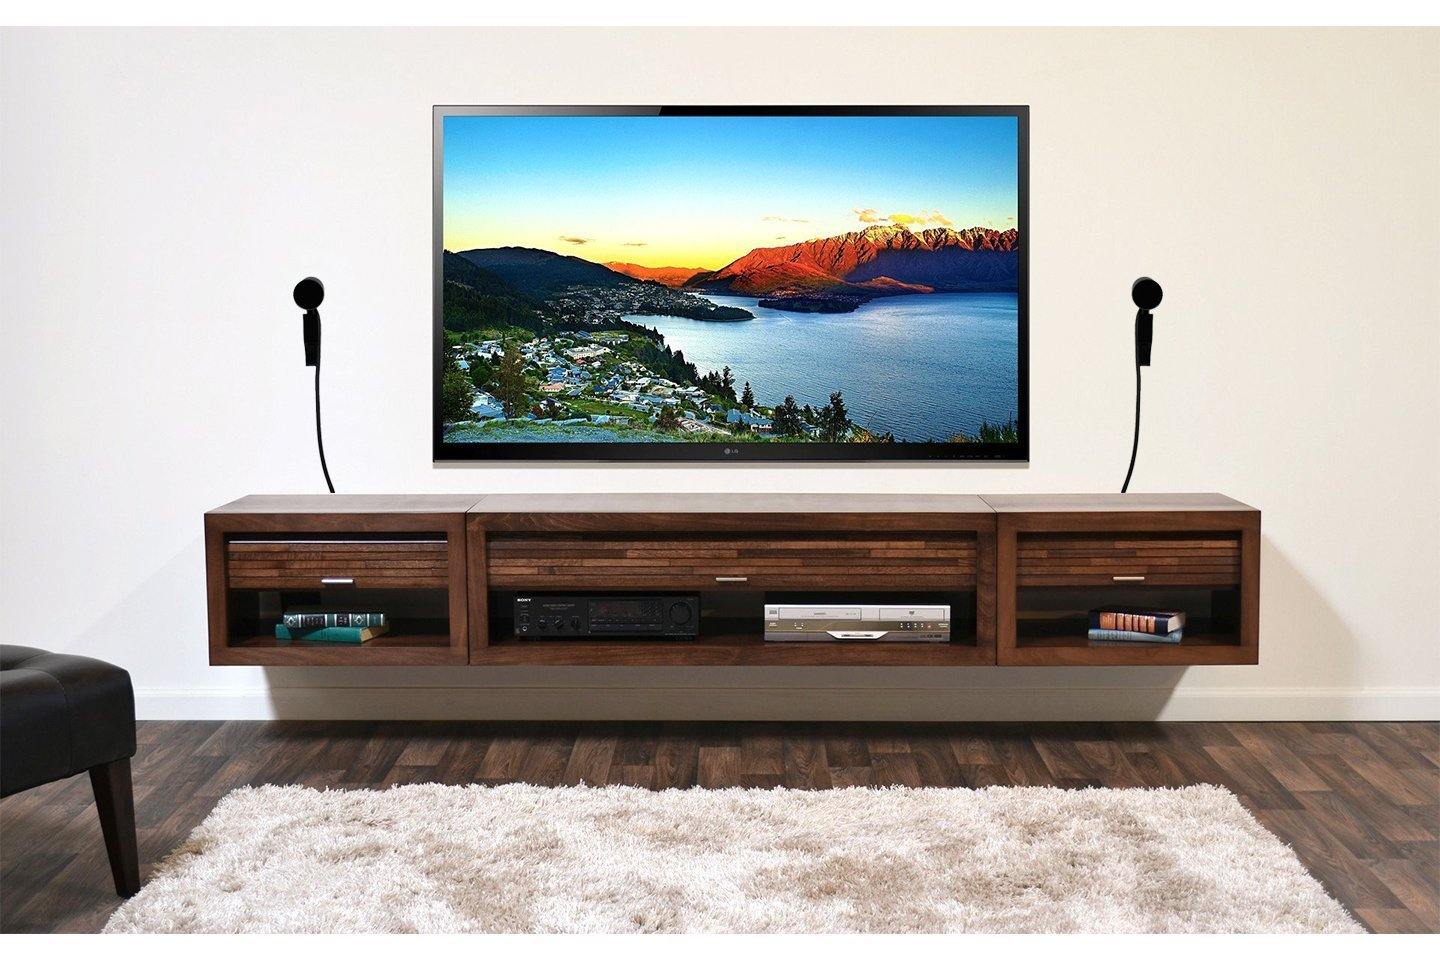
When I was planning my play space for my Oculus Rift, it was crucial that I get the maximum benefit of 360º room-scale tracking so I can enjoy total immersion when playing games that offer 6 Degrees of Freedom (6 DOF) such as Superhot.
The Oculus Rift bundle comes packaged with two sensors that track your position in virtual reality which provide you with an “experimental” 360ºdegree experience but not so much a room-scale experience, where you can walk around in your play space instead of standing still. Hence, I decided to get a third sensor. Unfortunately, the stands that come with the sensors are too short and are not practical for a 360º room scale setup, not to mention the following:
- Someone can knock the stands by accident and mess up your room-scale configuration forcing you to go through the annoying lengthy process of setting up your play space.
- Without mounting, it is more difficult to position the height of your sensors. For best results, a low and high sensor position is ideal.
- Using traditional mounting techniques require tools that can damage your walls. I am not a handy-man and I can’t even drill holes due to the rules of my apartment.
- Tall stands that hold sensors look ugly and take up precious floor space.
The Solution
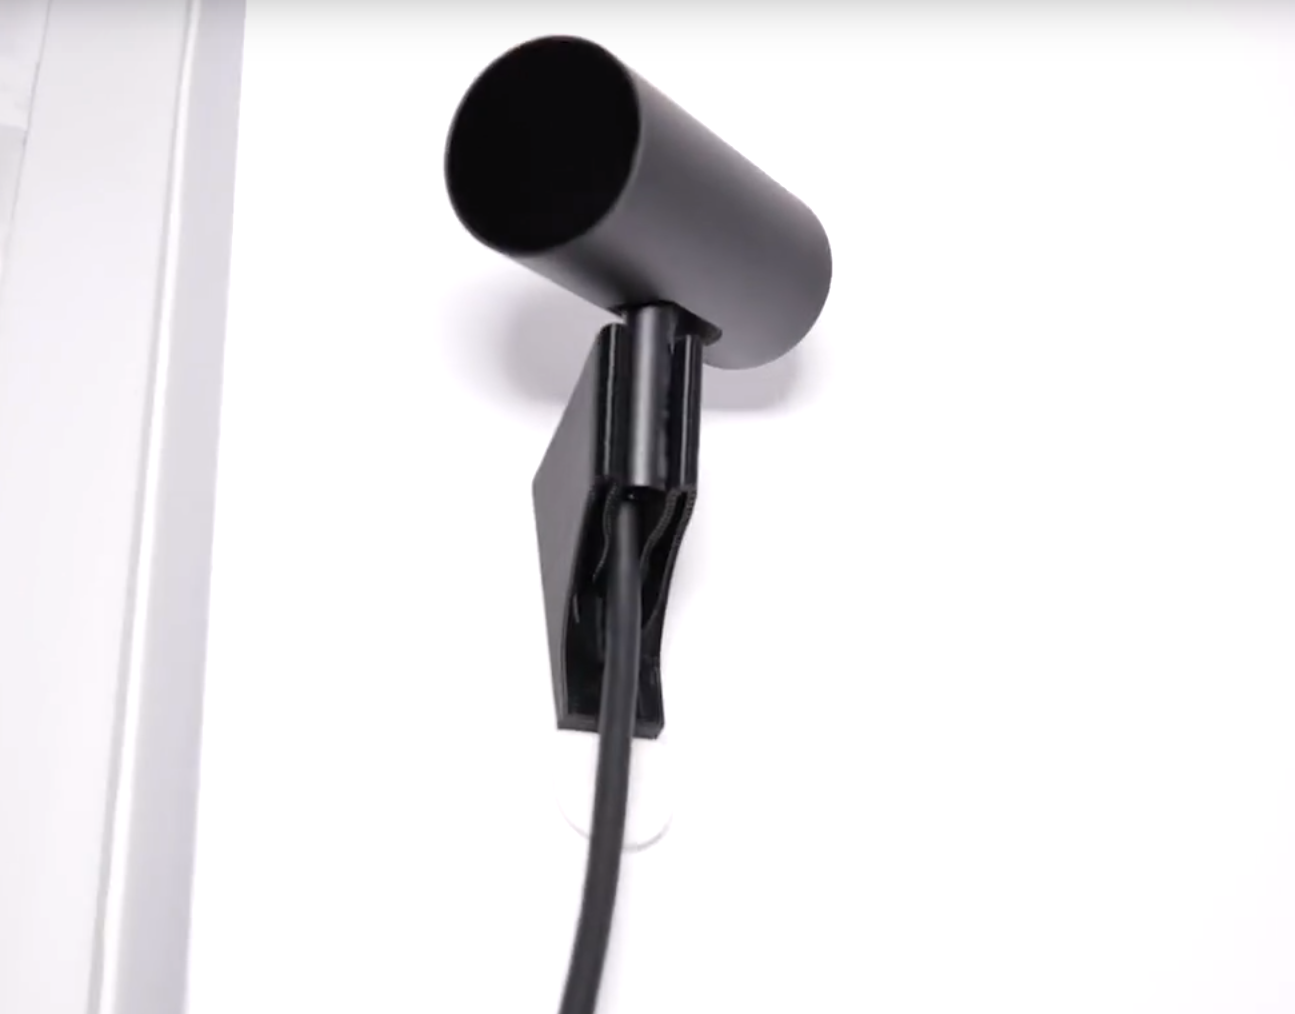
Fortunately, there’s an ingenious invention that lets you mount your Oculus Rift sensors perfectly so you only need to do it once and never again. These mounts are made by company called Glistco and they also offer all kinds of cool VR accessories. I highly recommend their Sensor Mounts because the setup was so easy and non-damaging to my walls. Jumping into VR is convenient because I never have to reconfigure my Guardian wall. Finally, they keep my wires neat and organized.
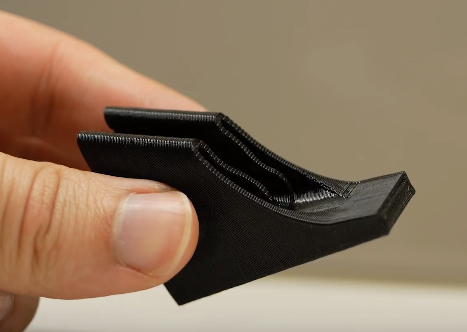
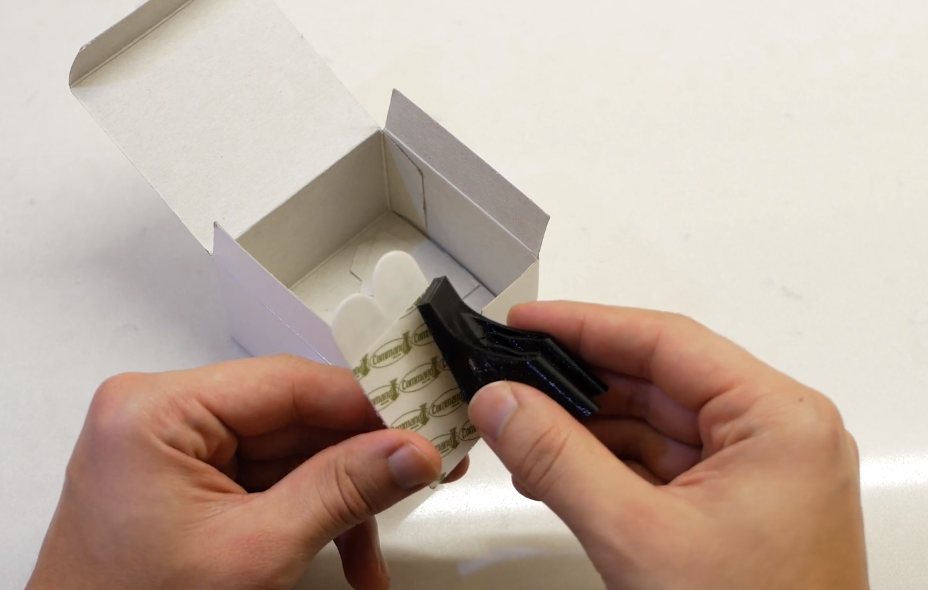
- These mounts come included with 3M Command Velcro strips that you simply stick onto your wall and on the mount and connect them.
- The mounts allow the sensors to be adjusted horizontally while firmly maintaining their configuration using friction. Coupled that with the sensor’s own vertical adjustment, you can achieve the optimal angle pointing at your play space.
- The mounts and supporting Command strips are sturdy and have not fallen once. If you need to remove the mounts, simply follow the Command strip instructions on how to safely remove the tape without damaging your walls.
As you can see below, I’ve mounted my three sensors at different heights, two being around 7 feet and the third at 2 feet. The diagram shows how far they are away from each other, but you can go further for an even bigger play space. This is big enough given the length of the cable on the headset.
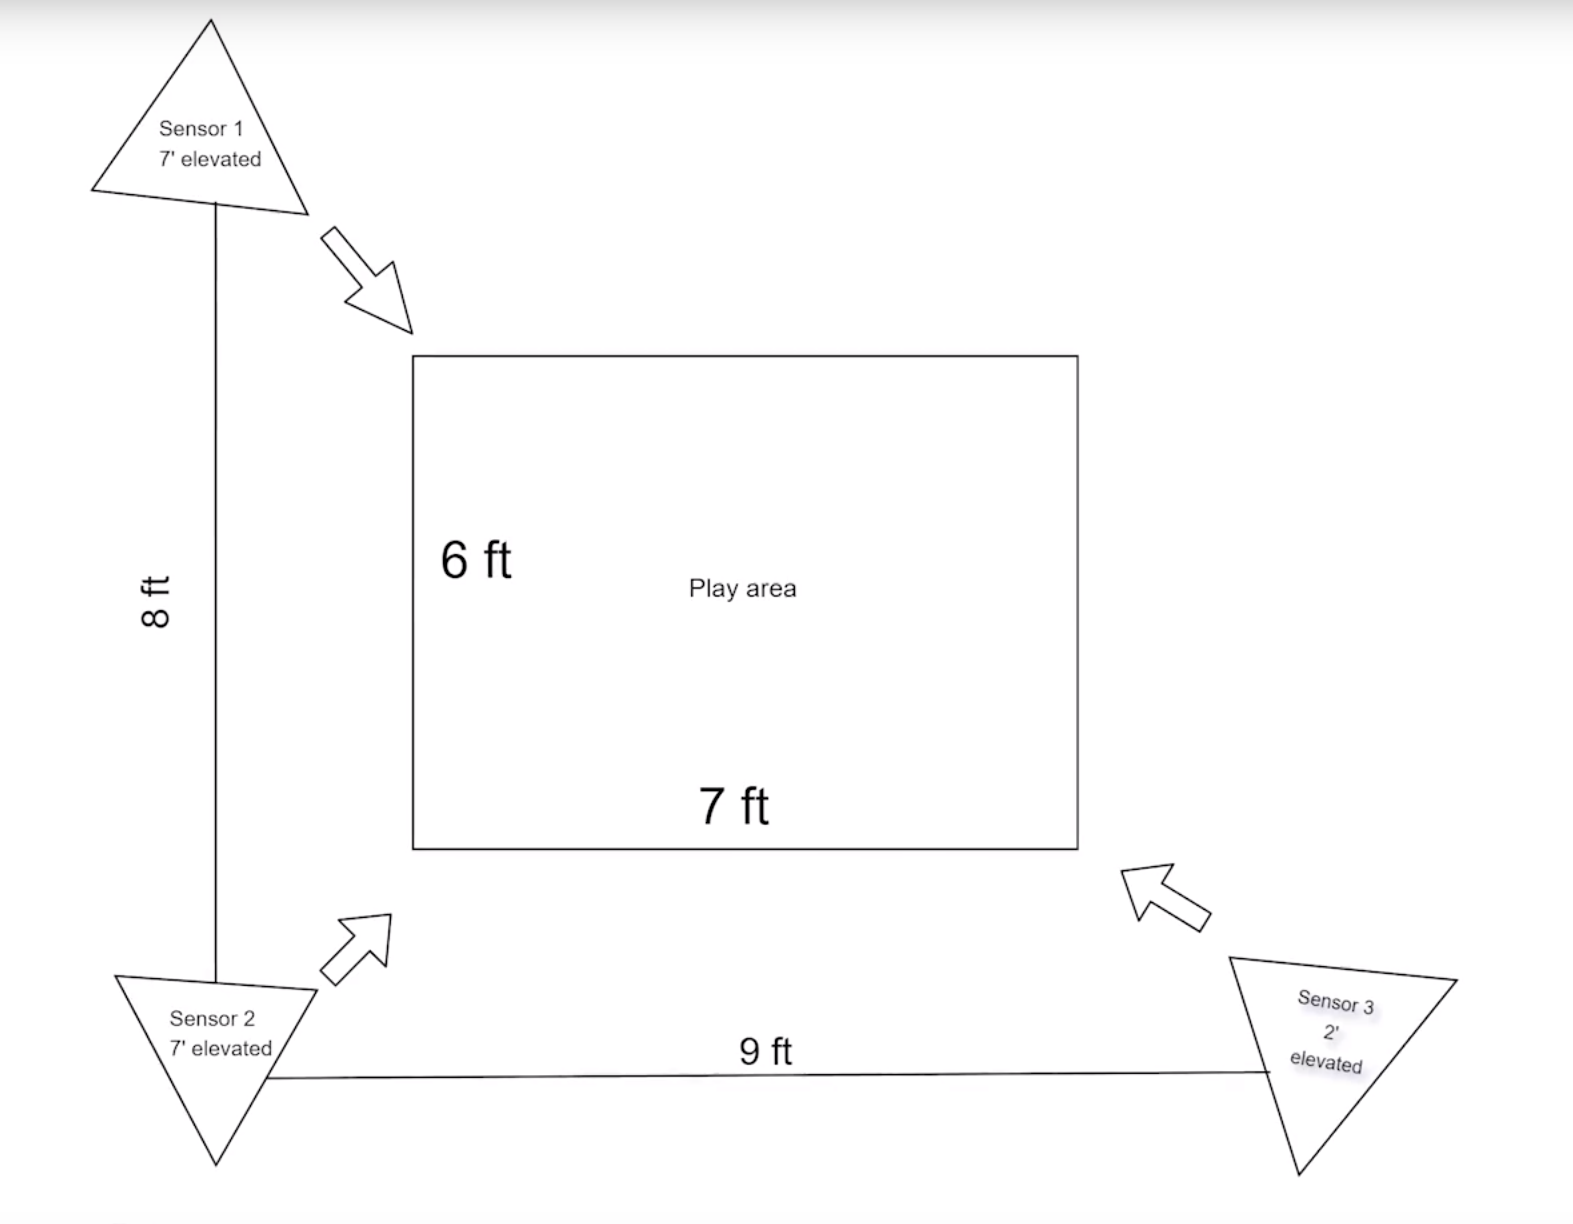
With 360º tracking, whether it’s two or three sensors, you’ll likely need an extra active USB extension for your furthest sensor. You can purchase can purchase a USB Extension here. You can also purchase everything here from Amazon, as I did.
I hope this article inspired you to either get an Oculus Rift, upgrade your 180º degree setup to 360º, or simply tidy-up your play space by using these mounts. If you have questions about my setup or Oculus Rift, please leave a comment on my YouTube video. Enjoy your Oculus Rift and see you in virtual reality!
Share:
Call of Duty - Tips & Tricks